What this is about

We live by the D'Entrecasteaux Channel in Southern Tasmania. It, and much of the Tasmanian coast, offer amazing cruising possibilities. Previously, we owned an old, sturdy and fast 33 ft Huon pine sloop that we loved. The things it didn't offer - easy portability to other waters, shoal draft, beachability and the simplicity of dinghy-like sailing - are the things we gradually craved more and more.
For at least a few years I have thought that I should build an open, or mostly open, 20-something footer that would satisfy these urges. After much looking around at designs, we finally settled on the Stir Ven.
She is beautiful, fast, seaworthy, floats in 25cm of water and is designed as an adventure boat on which one can spend a few nights.
We hope she will be ready for use by the summer of 2012/13!

Sunday, December 18, 2016

Kelpie is for sale

After a few years of excellent sailing with Kelpie, we have decided to sell her and move on to another build project.

She is a fabulous boat built with no expense spared and in excellent condition. She sails as well as all the descriptions of stir ven and will be missed.

for more details, please click here


Saturday, January 5, 2013

Kelpie is launched

I have been too busy to keep this blog up to date because I have been working really hard to finish the boat. I set a goal when I started on 1st July 2011 to finish by Christmas in 2012 and I really wanted to try and stick to the schedule.
I also figured that anybody who wants to learn how to build a stir ven would be much, much better served by visiting Mike Randall's thorough blog.

Today, the 6th of January 2013, Kelpie was born. Why Kelpie? there are several meanings:

- adjective - like kelp (a kind of seaweed)
- noun - a fish that lives amongst the kelp (also known as Wrasse)
- noun - a mythical Scottish sea creature that captures and drowns small children
- noun - an Australian sheep dog (we have one of these)

The launch was attended by a few boat-owning friends and also the sailmaker, spray painter, and chandler. We launched at Trial Bay, just south of Kettering and everything went smoothly. We set up the mast on shore and I attached the boom, gaff and mainsail but had them tied up. My friend Roger, backed her down to the water so that I could do the honours of pouring a little champagne on the bow and then giving a her a light push into the water.

Splash! All my nerves relaxed as I realised that she was floating and level with the waterline! We moved her to the other side of the floating pontoon so that we could set up the sails and get ready to sail off.

The conditions were perfect! We were facing out to sea and there was a gentle breeze blowing across the beam. Once we cast off the lines and after I realised that the centreboard was touching the bottom and lifted it, we shot off very fast! Our friends who watched from the shore said it was very impressive.

We sailed out into the D'Entrecasteaux Channel and headed north on a gentle breeze mostly on the beam. A few gusts pushed us over but also surged us forward. I am already really impressed with this boat!

A couple of small problems got us straightaway. The centreboard case cap timber is a little warped and should settle over time but, because I hadn't put any sealant there, water started splashing into the cockpit. My Wife, Briony, went to test the bilge pump and found that the hose was split because we had mounted the section of hose between the pump and through-hull with a too-tight radius. Luckily, not much water came in over our trip.

When the wind died off a little to 1-2 knots, we thought we'd test out the oars but didn't make much headway into the wind. We'll need to practice our rowing......

After a brief stop at anchor where our son Noah did some snorkelling, we then raised the sails again and sailed into Oyster Cove and to the small beach near our mooring - Our first beach landing.

Tonight Kelpie sleeps on our mooring and tomorrow morning we'll sail here again and then bring her home on the trailer (to fix the bilge pump!)

Thanks to the following people:

- Mike Randall - who has never once hesitated or complained at all the questions I have asked him. He shared a lot of knowledge and full sized patterns for things that he made (e.g. cleats, centreboard pattern). I think Mike's knowledge saved me many, many hours. I owe him quite a few beers and will be able to pay him when he comes to Tasmania for the wooden boat festival in february.
- Francois Vivier - this is a beautiful boat and the plans are excellent. He almost always answered questions within one day by e-mail
Mike Seeney - my best friend who was a boat builder who encouraged me to take on the project. I wish he was alive to see Kelpie and have a sail on her
- My children, Alice and Noah, who had a father who wasn't really that attentive to them on weekends for the last 18 months. Alice also helped with quite a lot of sanding and timber oiling.

Lastly, to my wife Briony. She never complained about all the time I spent doing this project. Time that I could have been doing more things with her. She picked up many jobs around the house and the land that fell by the wayside as I worked on the boat. This made our lives really very busy and, at times, very stressful during that last 18 months. I am sorry. This boat is for you. And for me too

daughter Alice and wife Briony aboard

checking all the halyards

parcelling up the mainsail

bridge deck in celery top pine

sits well on the trailer

still checking the halyards

bow fittings

silver wattle thole board

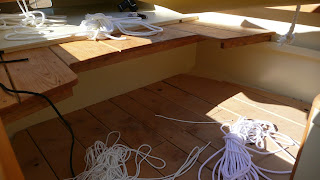
celery top pine seats and floor boards

loading the oars made of King Billy pine

Son Noah steering the boat down the ramp

roger does a good job backing boats

in she goes!

i didn't have to get wet

happy me

Noah relaxing on foredeck

Kelpie on our mooring on Oyster cove

Friday, September 28, 2012

a good way to make scuppers....

I've put on the rubbing strips - they're made of celery top pine - and I glued them down tucking in my fibrglass that I laid over the deck. The glass is now epoxied and ready to paint. Before painting the decks, I wanted to make and at least dry fit the toe rails, whilst deciding whether to epoxy the toe rails down prior to painting the deck or screwing and using a mastic-like compound.
So, I cut the toe rails with their tapered sides and went to cut the scupper holes. I tried with a router but that just shattered the wood. This was very sad because celery pine is expensive but lucky I only destroyed one of the short pieces of toerail. I could then use this piece to practice other ways of cutting the scuppers.
Next, I check Mike Randall's blog and tried his method - jigsaw then rasp. I couldn't do this either. Celery pine can be brittle and I was at risk of splitting off the bottoms of the timber.
So, after a bit of head scratching, here's the method I came up with that worked really well. I may not be the first one to do this but I did think of it myself.
After deciding the size of the scupper hole, choose a hole saw size that the scupper hole would be a portion of. Then, work out a spacer thickness that would occlude the part of the hole that you don't want and cut it from a scrap piece of timber. Clamp 2 toe rails together with the spacer in between.


toerail sandwich


then, cut the hole centering the drill bit in the spacer timber. Drill till the bit comes through then turn the sandwich over and cut from the other side (to avoid breakout/splintering)
Result - 2 neatly cut scupper holes from one cut!

two scuppers for the price of one!

here are some finished toerails

scuppers cut


and then I sanded them and dry-fitted them to the boat. Looks nice!

bow end

rear end

Thursday, August 23, 2012

overdue update

Here's a brief update of what I've been up to.....

I spent quite a bit of time making the hatchway, hatch and sliding mechanism. It was fiddly but quite satisfying work and I'm pleased that it all worked out well. I used Celery-top pine - a native Tasmanian timber that is traditionally used in boats - for the runners, trim etc. I will use this timber for most of the visible timber work (e.g. coamings, rub rails, toe rails etc). It is expensive because it is getting more scarce but it is well worth it as it is durable and quite a nice golden, blonde colour.

I was lucky enough to be able to borrow a bandsaw for a little while and this has made it easy to cut out the curves beams/trims for the hatch opening and hatch (5 curved pieces in all)


companionway with internal trim and slider rails fitted

I also filled all the dozens of screw holes on the deck (with TPRDA epoxy then epoxy putty) in readiness for glassing it

coachhouse suits the sheer of the boat nicely

deck screw holes filled (after removing screws)
Meanwhile, I have also been preparing celery top pine timbers for the next steps. I have dressed the coaming timbers and scarfed some timber for the rub rails. 


scarfed rub rails - they seem long!


Tuesday, July 24, 2012

lid is on

Last weekend, I finally put the lid on my boat. All the plywood decking and the coach-house roof is now on.
The decks were pretty easy to do. I coated them with epoxy on the undersides first and then started from the bow and glued them on. I was pleased to see that there was good contact with all the deck beams and the decks all look fair. For the aft-most piece of deck, I glued on all the hardware doublers, then epoxy coated it and painted it first as I didn't fancy having to paint the undersides of it once it was glued on. I also painted the lower deck area first

looks like a stir ven now!

the excess deck was trimmed with a router

lower deck area painted (I like my two small planes)

the cabin seems to fit the boat well


The coach house roof required the building of a jig which I did out of MDF (left over from the crate that my plywood pieces came shipped in) connected with pine stringers. I then epoxy coated the 3 layers of the 4mm ply (each layer was made of 2 pieces finger-jointed together) first with neat epoxy then with slightly thickened epoxy. I clamped and weighted and screwed down the ply (only at the edges which were to be trimmed off anyway). This seemed to work really well.

The roof, when I put it on, was just perfect. It sat perfectly in contact with the bulkhead, coamings and cabin front. I am very impressed with Mr Vivier's designing skills.

I am right now in the midst of deciding what to do about the deck. I really planned on putting a laid/glued timber deck on but I am having serious second thoughts.

positives - it looks really, really beautiful, feels nice underfoot

negatives - more maintenance, laborious to make, small risk of water getting in and causing problems with the ply, more expensive.

Regarding the expense, I was quoted $1250 for teak!!!! $6.30 per metre of 30mm x 5mm strips. I also considered celery-top pine a local Tasmanian timber that is used for decks but it has a tendency to splinter. Vitex, that Mike Randall used is a great option. It's just like teak but much, much cheaper. If I decide to do the strips I will try and get Vitex.

At the moment though, I am tending towards glassing and painting the deck. It will be easier, cheaper and less maintenance over the long term.


Sunday, July 1, 2012

foaming mad!

Vivier recommends foam in the 3 flotation chambers for very good reason. If a chamber is punctured and fills with water, the vessel may list and become unsailable. I looked into foams. Polyethylene foam  (trade name in Australia - microlen) that Vivier states is the best is the only foam that our Marine Safety Authority in Tasmania allows on vessels in survey. I think the reason is that's the only foam that is truly non-absorbent over years and is also totally fuel and solvent resistant. The problem is that it's very expensive. One sheet (2.4m x 1.2m x 0.1m) costs about $260. I figured that I needed 3 sheets and gulped at the costs.
I spent a while thinking about other options - polystyrene, plastic bottles etc etc but then thought that, seeing as I am using the best materials I can everywhere else (Austral marine ply, Bote-cote epoxy, Si-bronze fastenings) it would be silly to put in a foam that I might regret and then never be able to replace (those flotation chambers are sealed shut with epoxy).
So, I bought the expensive stuff. One relief was that I accidentally thought that all 3 chambers were the same volume. When I double checked, I found that the rear ones were smaller and so I only needed 2 sheets of foam. $500 instead of $750 - sounds cheap now!!

almost full of foam

After putting in 3 coats of epoxy (and drilling the limber holes and adding the eye for attaching the anchor rode) I started packing the foam into the front chamber. I fit most of one sheet in here (about 288 litres and the chamber is supposedly 300 litres).

I then fitted the foredeck to seal it all in.

foredeck on
I then asked my wife, Briony, who is the best at doing 3-D type spatial puzzles in our family if she could fit the foam into the rear chambers. She did a very neat job!

nice to see a bit of beauty in the boat shed!
The polyethylene foam is very nice to work with. It's stiff and won't compress much at all but it cuts easily with a sharp sashimi knife and doesn't make any crumbly mess.

Decks are now going on.....

Sunday, June 3, 2012

ready to deck

I haven't posted for 2 months and it's partly because I have not been building that much. As we also run a small market garden/vegetable farm, I had to do many jobs during autumn such as planting green manure and garlic, putting in new fences and building a farm shed to store our equipment that had been lying around for too long.
Anyhow, I have just spent the last 3 days working on the boat full time and it's been great. Even better is that I have the next 10 days to spend on pretty much pure boatbuilding.

Where have I got up to?

I have been cutting and installing the deck beams, half beams, the curved coaming backing, the mast staunchion.

forward

amidship

cockpit taking shape

staunchion with centre carling left slightly proud so I can plane the deck camber into it

nice to see the sheer line reflected in the coaming carling and flotation chamber battens
So now, I'm ready to put the decking on. But first, I'll paint the interior . I have already done 3 coats of epoxy in the flotation chambers. These won't get painted. I have also painted the stowage bins in the cabin and the lazarette. So now, I'll paint everything with one more coat of epoxy then use the high-build dtm-985 under the floors and a 2-pack primer everywhere else.